An Event is a specific activity or occurrence with a finite beginning and end time that has some type of entertainment value.
A Special is a promotional offer (usually some kind of cost reduction or discount) that takes place on or during a period of time.
While these two items have separate definitions, they function exactly the same in the Admin. In the Web Admin you can either create a new Event/Special or edit an existing Event/Special.
Creating a New Event/Special
- From your Web Content Dashboard, choose either the button for “My Events” or “My Specials” (near bottom of menu in left-hand box)
- You will be taken to a new page that lists all your Events/ Specials on a grid. Use this grid like you would use any in the WTD system (General Directions).

NOTE: At any point, you may return to this grid by clicking either “My Content Items” in the gray bar at the upper left of every page OR the box in the upper left corner of the form that says “Return to Items.”
- In the gray bar at the top center of the page there is a place to “Choose Resort” from the drop-down menu. Choose the resort AREA in which your Event/Special takes place (or is closest to). Please Remember, they must be placed in the area where they occur or they won’t be useful to website visitors. For example, a Vail-based business might be hosting an event in Denver but it’s not applicable on WTD Vail calendar.
- Next to that, the drop-down says “Choose Item.” Confirm that this is set to “Events” or “Specials,” depending on the the item you’re entering.
- Click the button for “New Item” (in the center of the gray bar in the center of the page).

- A popup box will open.
- Confirm that the correct business appears in the “Select Business” box. (Clients with more than one business will be prompted to select among their businesses. Clients with only one business should see this as their only option. If you do not see the correct business in this dropdown, please contact WhatToDo to request that your business be added.)
- Next to “Select Event/Special Type” hit the down arrow at the end of the field to select the Event/Special Type that MOST CLOSELY relates to your Event/Special – it may not be an exact description. Also, you will have the opportunity to add additional Types and categories later in this process.
- Type in your “Event Title” or “Special Title.” Correct format: First Letter of Each Important Word Capitalized.
Title Tips:
* Keep the title as short as possible.
* Put the most important info first because the title may be truncated for size considerations.
* Do not use all capital letters, all lower case letters or intentional misspellings unless that is a recognizable characteristic of your brand.
- Select Event Date or the start date of the Special by clicking the correct day on the calendar. Do not type the date.
- Click the “Create New” button.
- A new screen will open up with a mostly blank form. It should already include: Event/Special Title, Website, Phone Number and Email based on your business profile. (If any of this info is incorrect, you may correct it by clicking the “My Businesses” button from your Web Dashboard.) You also may overwrite it if, for example, you want to direct traffic to a separate event website instead of your home website.
- On the form that opens, you’ll have to complete the following fields:
Optional Tag Line – your “hook.” It gives the basic info about your Event/Special and tries to generate interest. On the live site, it will appear like a subtitle under your Title.
Event Description – Provide a summary of the event, basically “what’s happening” and “why.” (Other event info – like the Title, Date/Time, Cost, Contact Info – will appear in other places, so you don’t need to include it here.) NOTE: There is no specific size/length restriction for this content, HOWEVER web visitors will not commit to reading a large amount of text about something they’re not sure they’re interested in yet. Keep this content engaging and as short as possible while still providing complete information. If you’re cutting-and-pasting this text from another source please paste it into a text-only file (such as Notepad or RichText) FIRST. THEN you can copy it and paste it into the WhatToDo form to remove all unwanted web formatting
Event Cost – enter only a numeric value here (no need to type $) if there is a cost. Leave it blank if it’s free.
Direct Link To Purchase Tickets – If there’s a separate link to purchase tickets (other than the default organization/company website listed at the top right of this form), enter it in this field.
Phone/email – Confirm that the contact phone number and email are correct. (These fields are populated automatically based on the Business Profile. If these are intentionally different from the primary company contact info, overwrite them for this specific Event/Special. The change will only affect this specific Event/Special. If they are INCORRECT, you should fix the information in the Business Profile.
NOTE: Contact info IS public. It enables web visitors to contact the business questions about the Event/Special. If you don’t want this info to be public, please remove it from the field.
Types – Under “Event/Special Type,” the box you originally selected when creating this item should show up with a check mark. If the Event/Special fits under additional Types, you may now check those as well. Please check only the Types that truly represent your Event/Special.
Date/Time – Under “Dates and Times,” the Event Date or Special start date should appear automatically based on the date you originally set in the calendar. If you need to change it, you can select a new start date on the calendar that appears when you click inside the Date box.
- You can now set the Start and End Times for the Event or Special. If it’s an all-day event like a festival, click the bubble next to “All Day.” If the time has not been decided yet, you can choose “To Be Determined,” but please remember to update this info once the time is set.
- Select “Yes” or “No” for Recurring Event.
- If your Event is recurring, different options will appear for setting the pattern of recurrence. You can set: Repeats “daily,” “weekly” (specify day of the week), “monthly” (specify day of recurrence), or recurrences on a specific date every month
NOTE: The day the event repeats on MUST match the event start date. (For example, if your events take place on Mondays, the event start date MUST be for a Monday, NOT the Sunday before.)
- Events that recur irregularly cannot be set using the Recurring option. To do this, you’ll have to fill out the form for the first occurrence. Once all the info is complete, click the “Copy Event/Special” button at the top or bottom of the form, then update Date, Time and other info for the next occurrence.
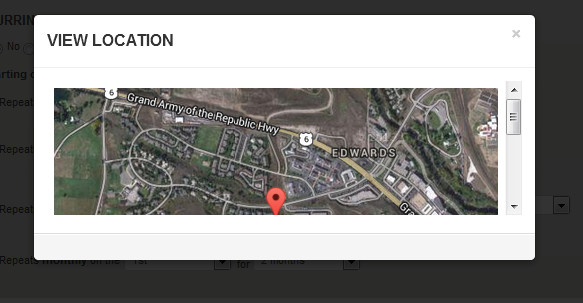
Creating New Location
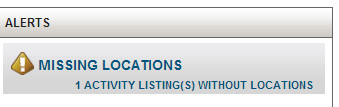
- Every event MUST have at least one Active Location or the listing WILL NOT appear on the live website. The Location that appears automatically in this box is based on the info in your Business Profile. If this is the correct Location for the Event, simply make sure the box at the far left of the Location is green and says “Active.” If the box is red and says “Inactive,” click it and it will change status.
- If your business location is not the location for the Event/Special, click the button on the right side of the Locations box that reads “Add New.”
- A new popup box will appear. You will need to “Select a Location” from the dropdown. This is a specific area/neighborhood/town within your resort area. Then enter the street address. City, state and zip will be generated automatically on the form.
- Click the “Submit” button.
Updating Existing Location
- If the location that appears is correct but contains an error, click on the “Edit” icon (the yellow square with the pencil image) on the right side of this field.
- Revise the info in the popup box that appears. Click “Submit.”
- Back on the main Event form, make sure the box to the left of the correct Location(s) is green and reads “Active.”